Blueberry cobbler for the 4th

We have a tradition, every weekend of or around the 4th of July, we have a party. We invite friends and neighbors and have brisket, potato salad and one of my personal favorites: blueberry cobbler.

It’s an easy recipe, and when I first made it for the party, I didn’t realize I was starting a new tradition by bringing it. But isn’t that how most traditions go? You start doing it and one day, you realize it if you stopped, it wouldn’t feel the same. It’s part of the process, which I love. Good traditions are deeply comforting, root us down and remind us of blessings.

I’d certainly call my blueberry cobbler deeply comforting. And my kids will agree. It’s one of their favorites too.

It started when I had found the best place to pick blueberries, so I had an abundance. And being the middle to end of June, our blackberries weren’t ripe and my raspberry starts we’re not producing yet, so blueberry was the only option unless I wanted to buy frozen fruit.

Which, I did not. I’d rather use what we have gathered ourselves.

So I modified a recipe I found from King Arthur, and the blueberry cobbler found it’s place in our Fourth of July celebrations.

It’s an easy recipe.

Clean off your berries.

This is my grandmothers old Wilton cake pan. It is huge. Huge! It will hold the batter for 3 cakes and make one large sheet cake or a massive cobbler. You can find one like it here:

When I first inherited the cake pan, I wondered what I’d ever use it for, but that cake pan gets used a lot. For casseroles, cakes, cobblers, you name it!

Next add in 1 1/2 cups sugar and 1 1/2 cups flour, and mix around with our fingers gently.

Sprinkle some sea salt on top, just a pinch or two.

Put your pie crust on top (there’s a million good recipes, but the one I use I listed below)

Bake at 350 for over an hour. This is not a fast baking project. I’ll start checking it at an hour and then will take it out when the filling is bubbling and the crust is slightly golden.

Because it’s such a large cobbler, I never get the crust perfect.

And there you have it! I’ll list the recipe next, so it’s easier to make if you’d like to try out our Fourth of July tradition.

Blueberry Cobbler

4-5 quarts of blueberries

1 1/2 cup sugar( or 3/4 cup honey)

1 1/2 cup flour

2 pinches salt

Crust:

2 cups flour

1 1/2(ish) cup coconut oil

1/4 tsp salt

Chilled water just enough to combine.

Directions

Combine all berries, flour, sugar and salt in baking dish( this makes a big cobbler). Then make your crust buy cutting in the fat to the flour, and roll it out till less than 1/4 inch thickness.

Carefully lay it over your cobbler and bake at 350 for at least an hour. The time will vary depending on your berries, if they are frozen or fresh.

Enjoy!

It’s jelly time…

As soon as the warm weather starts to thaw the frozen winter, I know the growing season is going to bury me under wonderful things I’ll want to preserve for the coming year.

My first canning endeavor is usually asparagus, however this post is about a often unsung hero of jelly—the currant.

Currant bushes

These beauties make some delicious jelly, and you don’t even need to add pectin, just equal parts sugar and juice. Boom, done. Simple as that! However my favorite go-to for all sorts of jelly making and canning juice is my steam juicer. I’ll include the link, and yes disclaimer, it’s an affiliate link. But this steam juicer is a game changer.

If you don’t know how it works, I’ll quickly explain. There’s three tiers, one holds water to create steam which rises into the top layer of the basket sieve which holds the fruit, and the juice filters down into the sandwiched between section, which has the tube attached so you can allow it to flow into your jars.

Easy peasey. And you toss the left over pulp into the trash, or your very enthusiastic chickens.

Currants are a labor of love to pick, they are a practice in patience.

Once you’ve collected all your juice, measure it out. From nine pounds I was able to get about 5.5 cups of juice. Add equal parts sugar to juice, and cook over medium to high heat till the jelly is over 220 degrees and will gel if put on a cold plate from the freezer.

How water bath the pints for 10 minutes, and boom. The richest, deepest flavor jelly ever.

For tie reference, mine boiled for over 15 minutes while I stirred, to reach the gel stage.

There’s nothing like the “snap” of the canning lid sealing when you take it out of the water bath. Music to my ears.

I ended up with 10 pints of jelly.

Word to the wise from the not so wise, clean out your strainer portion of the juicer immediately after you’re finished. I…did not. We had a cousin over and the kids were playing on the slip and slide, so I didn’t want to steal the hose.

I should have stolen the hose.

When I say that currants have a lot of pectin, I’m not kidding. This is what I’m dealing with today…

It is like concrete.

Lessons have been learned. So learn from my mistakes and clean it up asap. You’ll thank me.

1000 Follower Giveaway!! and Climbing Heartbreak Hill Blog Tour – Catherine Bennett

Congrats to a friend!

Joselyn Vaughn

FireworksI’m so excited to have reached a THOUSAND followers on Twitter this week. I never thought there would be that many people who would want to put up with repeated tweets about the horrors of potty training. To thank all my wonderful followers, I’m giving away a $25 gift certificate to Amazon.com. Leave a comment below to enter. Drawing will take place on Friday, June 7.

Climbing Heartbreak Hill book cover


I’m also over at Catherine Bennett’s blog (http://catherinebennett.org/), talking about Climbing Heartbreak Hill
And it’s National Running Day! Hoping I can finally pick a race for the fall and get a run in tonight. Any suggestions for half or full marathons in Michigan?

Have a great day!

View original post

Kiefer, my new Mayo.

The many faces of Kiefer!  As I’ve continued my research to feed my growing family nutitious and worthy meals, I’ve learned a lot about what to NOT feed them. Recently I’m becoming more aware of the danger of Genetically Modified Foods.  One of the sneeky ones I didn’t realize was canola oil.  Now, Canola oil in and of its self isn’t inherently bad for you, but the processed and genetically messed with variety that is in most mayonnaise, salad dressings and a million other things, is not healthy. So with a adventuresome spirit, I chose to make my own mayo.  And failed.  FAILED. Seriously. It was bad.  I still don’t know what I did wrong, but I do know that I needed it. I was making potato salad and had everything all perfect…except the dressing.  I was not about to run to the store to buy the mayo I was already becoming leery of because of its processed nature, so I got creative.  

While searching through my fridge I saw a carton of Organic Kiefer. Could I use it to make dressing for the potato salad? It was worth a shot. So I poured about a cup into a bowl and began to add garlic powder, granulated onion, salt, pepper and  mustard.  I mixed it and took a tentative taste.  it was perfect and even had a bit of a tang that seemed to make the dressing ‘pop.”

I put it on the potato salad and served my family. No one noticed my switch. In fact there was none left. So I apologize for no pictures…but that should be evidence enough to prove that it works.  

That switcher-roo got my imagination going. What ELSE could I sub Kiefer for? So far this week I’ve used kiefer to make Ranch dressing and another batch of potato salad.  For those of you who are interested, here’s my recipes for both the Potato salad recipe, and the Ranch Kiefer:

Ranch Kiefer dressing.

1-2 tsp of dill weed (dried) depending on personal preference.

1-2 tsp of garlic powder (again, go with your own taste. I love garlic. I use a lot.)

1 Tsp onion powder or granulated garlic

1/4 to 1/2 tsp salt

1 cup of kiefer, plain and unflavored

pepper to taste

You can also add in parmesian cheese or cracked peppercorns if you wish. Experiment!

Mix well and enjoy. The flavor only gets better with time, so make some and refrigerate what you don’t use for a yummy treat the next day!

Kiefer Potato Salad Dressing:

1cup of Keifer 

2 TBSP of prepared mustard

Salt and pepper to taste.

Mix well and adjust the mustard, salt or pepper according to your desired tanginess. You can also pour in a bit of pickle juice for that additional bite. We like to use the ‘ends’ of the pickled asparagus we can, it’s a truly delicious treat.

Enjoy!


Please leave a comment and let me know if there are any other wonderful ways to use Kiefer! Thanks!

Sauerkraut

A while ago I began to hear a lot about ‘fermented’ foods and their probiotic properties and how they helped with digestion.  As I began to explore, one of the first foods I tried to ‘ferment’ was cabbage. Personally, I was never a fan of the store bought variety.  But I pressed on, and tried it.  My first batch turned out wonderful, my next was a total botch. I was totally confused. After a few trials and errors, I found a fool proof recipe and a little step I take as ‘insurance’ to make sure it turns out alright.  Really, its a balance of salt versus time; time for the bad bacterial to be held off by the salt till the good bacterial can grow and flourish.  And a side note, it will stink at first.  But that’s normal. One day I dream to own a real krauting pot, but right now I use a mason jar or an old crock. Both work because as long as you keep the cabbage submerged under the liquid, it will go to town.  Here’s what you’ll need.

Two heads of cabbage

Two Tbsp of unrefined sea salt

2 cups of water

A small plate or a small glass

Something to mash the cabbage with

Knife

Cutting board

Bowl

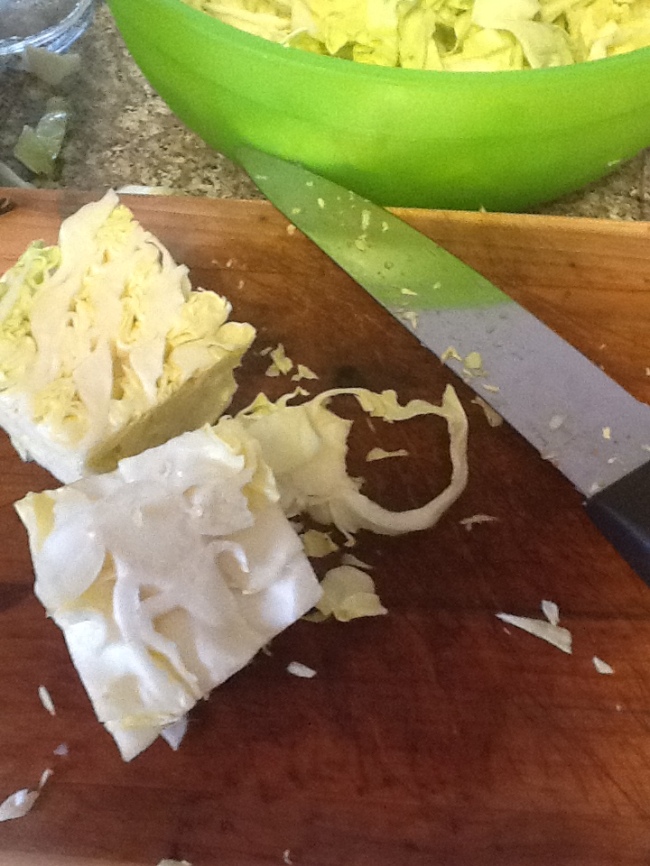
First. You’re going to want to slice your cabbage thin. I don’t use a mandolin, but I’ve heard they are amazing. I use a sharp knife and a homemade cutting board.  

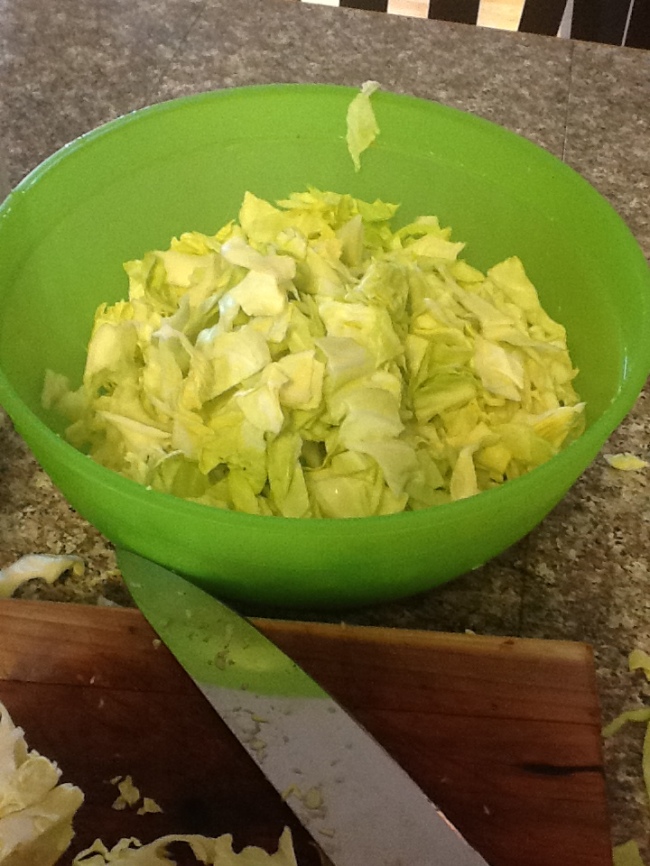
As you slice the cabbage, toss it into the large bowl


Image

Once finished, sprinkle all the salt over the cabbage and mix with your fingers.


Image

Leave it for a half hour

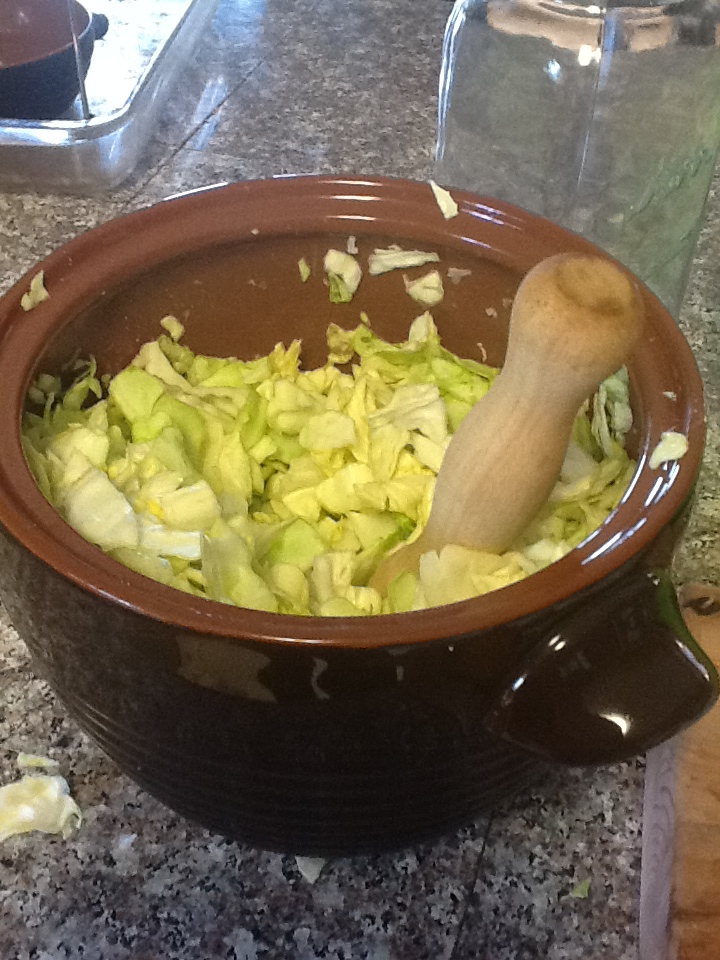
When you return the cabbage will have ‘leaked’ water. YAY! If you can, pound it a bit to bruise the cabbage, but its not necessary. Let it rest a bit longer.

Get your jar or crock ready. Fill it will the watery cabbage, pressing it down hard as you fill it. (wide mouth jars work best) Once it’s filled, press the cabbage down BELOW the water line. 

If you have room, take a cup of warm water and sprinkle a 1/2 to 1 tsp of salt and stir till dissolved. Pour into your jar.  Take a smaller jar or glass and press down the cabbage, then put a lid on your jar, holding the smaller jar or glass down and keeping the cabbage below the waterline.  

Hooray! You’re done…for the next few days.  Every few days ‘burp’ the jar to let the gas that is a result of the awesome fermentation going on.  The cabbage will bubble and after a few days begin to taste sour.  Taste it every few days till you are happy with the result and then store it in the fridge for up to six months. 

Not so hard huh? Let’s re-cap. You shred the cabbage, sprinkle salt over it. Wait. Press it into a jar, cover with a bit of salt water and press it down with a glass and then screw a lid on. When I put it that way, it’s a cinch, right? You’ll love the tangy taste of the fresh sauerkraut and your body will LOVE the probiotics and vitamins from the cabbage and fermentation process.  You want to keep a healthy gut. 80% of your immune system is in your gut. Bet you didn’t know that. So especially during the flu and cold season, stock up on this friendly little fermented treat. You’ll be glad you did.

Opening…

Welcome to Traditional Nourishment.   It’s my joy to share with you my adventures in finding new or rediscovering old ways to bless my family.  This blog will give tutorials on fermenting foods, home projects, soap making, and many other topics but will use them to drive home the more important topic of blessing our families.  Shortly I’ll post a short tutorial on how to make your own sauerkraut, but first a little about  me.

I’m a stay at home mom of four ( soon to be five children) who also homeschools.  I serve God with all my heart, from that flows the love and devotion I pour over my family.  I stumbled onto many of these projects out of necessity either from needing to cut the budget or by needing to modify our diet because of allergies.  Slowly its evolved into a deeper understanding of how God has made our bodies so fearfully and wonderfully, along with how creation fits into it, blessing us further by it’s nourishment.  Some of the topics I’ll introduce will be new, some will be age old but all will be to bless your family, as they have blessed mine.

So, welcome. God’s blessing on you, and let’s have some fun together.